Spraddle Legs In Chicks: Causes, Treatment, Prevention
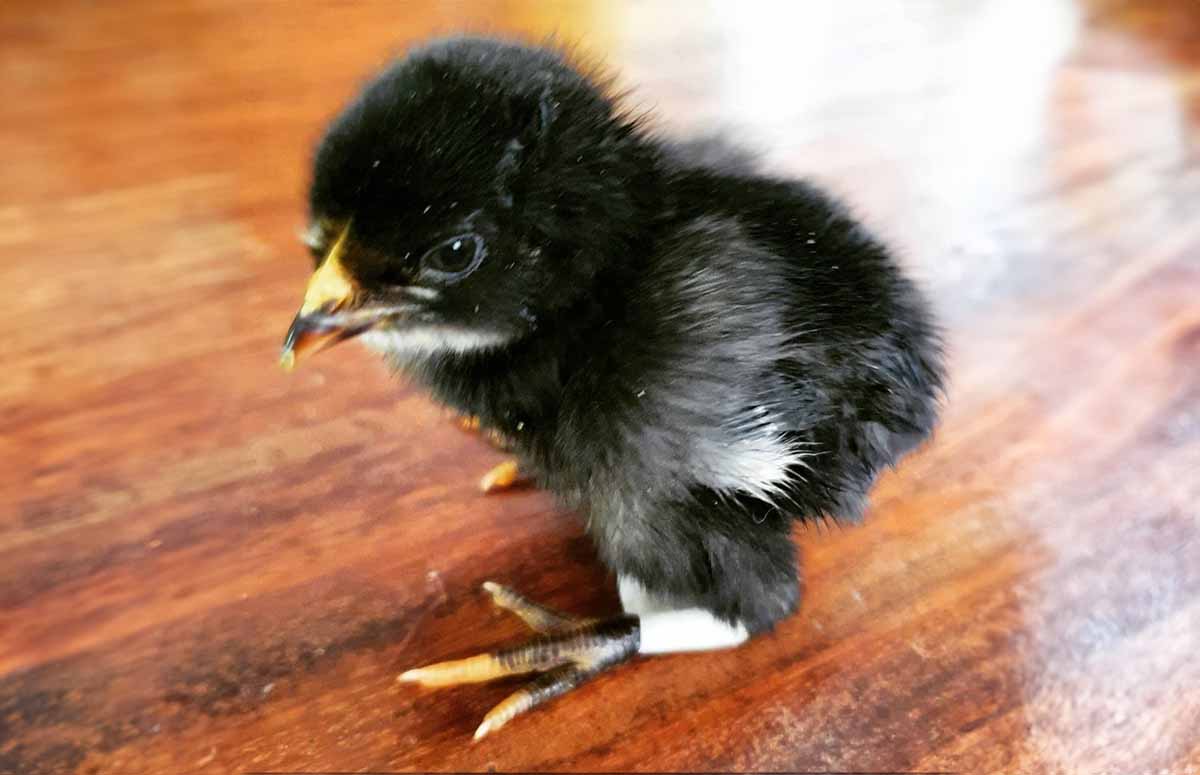
Spraddle legs, also called splay legs, are one of those conditions that can easily scare new chicken keepers. And, indeed, if left untreated for too long, spraddle legs can cause a very unfortunate and permanent physical deformity in young chicks.
Fortunately, this issue is easy to treat and utterly inconsequential in the long term as long as it gets addressed soon enough.
Let’s look at what exactly spraddle legs in chicks are and what are their causes, treatment, and prevention.
What is ‘Spraddle Legs’ in Chicks?
Spraddle or splay legs happen when a young chick’s legs suddenly start splaying to the sides and are left incapable of supporting the chick’s weight or allowing it to stand and walk properly.
While this issue can look like a serious neurological problem, it is essentially just a tendons injury in the feet and legs and a subsequent muscle weakness because the chick’s legs can’t develop properly.
What Causes Spraddle Legs in Chicks?
The tendon injury at the roots of spraddle or splay legs can happen due to several factors.
These include:
- Improper incubator temperature and/or frequent temperature fluctuations hamper the chick’s development inside the egg.
- Inadequate brooding from the hen, which can result in not-properly-developed chicks.
- The chick has been improperly positioned inside the egg – something that can be a matter of just bad luck.
- A slippery floor or bedding material in the brooder is the most common cause of spraddle legs in chicks. A slippery floor, usually one covered with newspaper clippings, prevents the chicks from standing correctly and leads to tendon injuries.
- A rarer cause can be direct physical trauma after the chick has hatched. This can include mishandling by the chicken keeper or an accidental tumble after getting shoved by a larger chick.
In other words, looking at its causes, spraddle legs aren’t so much a singular condition such as a disease. Rather, they are just the consequences of physical trauma, similar to a sprained ankle in a human.
What makes spraddle legs dangerous is that they are a trauma that occurs in newly hatched chicks. So, if it isn’t treated immediately, it can lead to some pretty nasty issues in the chick’s development, including ones that can leave it unable to walk. To avoid that, here’s what you can do.
Treatment of Spraddle Legs in Chicks?
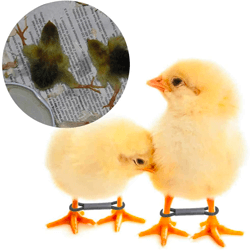
Treating spraddle legs in chicks is all about reacting fast enough and performing a simple DIY splint or hobble on the chick’s legs. This way, they can stay in the proper position for a few days until their muscles develop properly.
And that’s about it! There is no need for either expensive and heavy medications or calling the vet (although a quick phone consultation never hurts).
There are a few important Dos and Don’ts; however, that need to be adhered to if you want to fix the problem adequately as well as avoid accidentally causing an even bigger issue. So, while the treatment is easy overall, you should still be careful.
Here’s what you’d want to do:
- React as fast as possible if you have a chick with spraddle legs.
This is important because if you’ve left your chick saddled with this problem for too long, the tendon damage and the muscle underdevelopment may become too severe to fix. - Look for chicks unable to stand or walk.
Watch out for chicks that cannot stand or walk properly while others no longer have issues doing so. Such chicks will appear as if their legs are too far from each other and constantly sit on their behinds. - Once you spot a chick with spraddle legs, pick it up and feel out its legs.
Look for any unusual lumps on the joints or whether something is bent incorrectly, as that can indicate a more significant problem. However, if the legs feel normal and are splayed to the sides, you’re dealing with spraddle legs. - Put improvised hobbles around the chick’s legs.
This can be done with a lot of different materials. Most people recommend vet wrap or vet tape – the veterinary equivalent of Coban wrap – and it is an excellent tool for the job. However, you can use a simple band-aid if you don’t have any on hand.
The beauty of vet wrap is that it sticks effortlessly to itself but doesn’t stick to the chick’s down feathers.
Whichever material you go with, the idea here is to take 3-4 inches of it, loosely tie one end to one of the chick’s legs without covering any of its joints, and then tie the other end to the other leg the same way, leaving no more than an inch or so of space between them. Here’s a video example of how this should be done.
What NOT to do when treating spraddle legs in chicks:
- Don’t stretch the wrap too much, and don’t tie it too tightly around the chick’s legs, or you may affect the blood circulation and cripple your chick even more.
- Don’t leave too much distance between the legs, or they’ll just continue splaying to the sides. The purpose of this improvised hobble is to keep the legs in the right position so they have time to heal and develop properly. The right distance is typically about an inch or simply the width of the chick’s body.
- Don’t cover the knees and other joints on the chick’s legs, as that’d prevent them from moving properly.
- Don’t leave the chick with too little space between its legs either; it will be effectively shackled and unable to walk.
After applying the hobble:
Once the hobbles are in place, your chick should be able to stand on its own feet without much issue. Or, at least, it will start learning. At first, the chick will almost certainly dislike the improvised hobbles and keep toppling over. However, this will change over time, so you should be patient – the chick’s legs will still be weak.
If the chick keeps toppling over, you can put it in a small container to prevent it from falling over and incentivize it to stand on its feet.
15 to 30 minutes of this should be enough for the chick to get the hang of things. After that, you can move it to a larger space where it can walk more freely.
Once the first 24 hours have passed, it’s time to remove the hobbles and check on the chick’s progress. If its legs start splaying again – which they likely will at this point – it hasn’t healed completely. So, put on a new pair of hobbles and wait another 24 hours.
This removal and reapplying of the vet tape every 24 hours should be done even if you’re sure the chick’s legs won’t be fully healed yet. That’s because newly hatched chicks grow incredibly fast, and yesterday’s wrap will almost certainly be too tight around the chick’s feet just 24 hours later.
The vast majority of chicks with spraddle legs get healed after just 3-4 days with hobbles on. They may still feel a bit wobbly on their feet for a few more days but that should fix itself over time too.
Prevention of Spraddle Legs in Chicks
You can never remove 100% of the risk of splayed legs, as sometimes it happens because the chick wasn’t properly positioned in the egg. However, the two big tips for proper prevention are:
- Ensure that the incubator is always set at the optimal temperature and operating properly.
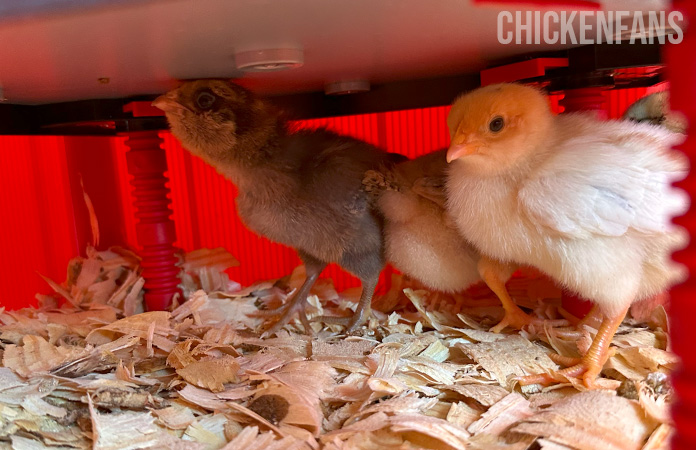
- Make sure that your brooder’s flooring isn’t too slippery. Use the correct bedding, like paper towels or pine shavings but avoid using shredded newspaper.
These two simple tips should minimize the number of spraddle leg cases you see in your chicks by a great deal.
In Conclusion
Spraddle legs in chicks look scary and can indeed have long-term implications but they are very treatable if you know what to do. Once you get the hang of putting the vet tape on properly, you should be able to deal with this issue without much headache.
Still, avoiding this issue altogether is the best-case scenario, so you may want to fix your incubator and your brooder’s flooring going forward.
Credits Featured Image: ploning_judith (IG)


